
Getting organized can be a game changer, especially when it comes to your toolbox. If you’ve ever found yourself rummaging through a cluttered mess of tools, you’ll understand the frustration. This post is here to help you conquer that chaos. I’ve gathered some clever and practical toolbox organization ideas that will make your tools easy to find, allowing you to focus more on your projects and less on searching for the right tool.
This guide is perfect for DIY enthusiasts, home improvement lovers, or anyone who just wants to keep their workspace tidy. If you care about creating a clutter-free environment, you’ll find these ideas refreshing and useful. Whether you have a small garage or just a corner of your home for projects, these solutions are designed to maximize space and boost your efficiency.
In this post, you will discover twelve innovative toolbox organization ideas, from DIY pegboards to repurposed suitcases, that will help streamline your workspace. Each idea is simple to implement and tailored for small spaces, making them perfect for anyone looking to enhance their tool storage solutions. You’ll walk away with the inspiration to create a more organized and efficient work area, where every tool has its place and is easy to access.
Key Takeaways
– Discover creative toolbox organization ideas that fit small spaces, making it easier to find and access your tools.
– Learn how DIY solutions like pegboards and magnetic strips can transform your workspace into a clutter-free zone.
– Explore repurposed items that can serve as unique storage options, adding both function and charm to your space.
– Get tips on using clear bins and drawer dividers to keep tools visible and neatly arranged for quick access.
– Understand the importance of an organized workspace and how it contributes to efficient tool management for your DIY projects.
1. DIY Pegboard System

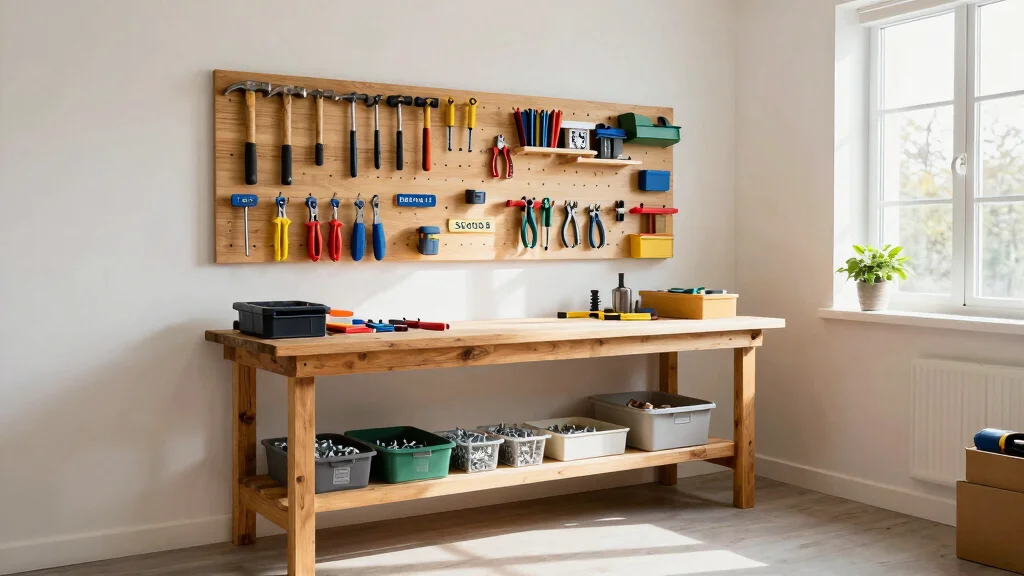
A DIY pegboard system stands out as a clever solution for keeping your tools visible and organized. This versatile design element allows for a tailored arrangement, accommodating your unique collection while ensuring ease of access. Whether you choose vibrant colors or classic neutrals, a pegboard can serve as a functional art piece in your workshop or garage.
To implement this idea, mount a pegboard on a convenient wall and utilize hooks and shelves for optimal tool placement. This not only prevents the frustration of digging through a cluttered toolbox but also adds a personalized touch to the room’s decor.
Here’s how to create your pegboard:
1. Select a wall space that is easily accessible.
2. Purchase pegboard sheets and various hooks from a local hardware store.
3. Secure the pegboard to the wall with strong anchors.
4. Arrange your tools with hooks for hanging and shelves for larger items.
5. Label different sections to simplify reorganization.
This approach maximizes your wall space while exhibiting your tools in an attractive way!
Fun fact: 40% of small-space tool chaos comes from empty wall space. A DIY pegboard system turns every hook into instant tool access, turning tool box organization ideas into visible, practical art. Your next project? mount it high, color-code, and declutter fast.
DIY Pegboard System
Editor’s Choice


2. Magnetic Tool Strip

Consider a magnetic tool strip for an innovative way to keep your metal tools organized and readily available. By simply attaching this strip to a wall or workbench, you can effortlessly store essential tools without the bulk of traditional storage methods. This minimalistic solution works wonders in smaller spaces and is incredibly easy to set up.
Enhancing your workspace with a magnetic strip allows you to save time searching for tools. You’ll appreciate how simple it is to keep everything neat and tidy while maintaining a clean aesthetic.
Steps to set up a magnetic tool strip:
1. Choose a magnetic strip that’s strong enough for your tools.
2. Securely mount the strip to your wall or workbench.
3. Organize tools by placing them against the magnet.
4. Experiment with different arrangements to improve functionality.
With your tools on display, you’ll find everything you need right at your fingertips, making this addition a must-have for any DIY enthusiast.
Magnetic Tool Strip
Editor’s Choice


3. Repurposed Suitcases

Repurposing vintage suitcases for tool storage offers a charming and practical solution for organizing your tools. Not only do these unique containers provide ample space for your gear, but they also add a stylish element to your decor. The portability of suitcases makes it easy to transport your tools wherever your projects take you.
Stacking or displaying suitcases can create an eye-catching focal point in your workspace. This creative approach not only manages your tools effectively but also embraces a nostalgic aesthetic that you’ll cherish.
Steps for using vintage suitcases:
1. Find a sturdy suitcase at thrift stores or garage sales.
2. Clean the interior and discard any unnecessary items.
3. Use organizers or bins to categorize tools inside.
4. Stack multiple suitcases for a chic look or store them on a shelf.
This fun storage option allows for efficient tool management while adding character to your space!
Repurposed Suitcases
Editor’s Choice


4. Drawer Dividers

Implementing drawer dividers in your toolbox or workbench drawers is a fantastic way to keep everything organized and easily accessible. This method prevents the chaos of digging through a jumble of tools, ensuring that each item has its designated place. With dividers available in various materials, you can customize your storage to fit your specific needs.
By using drawer dividers, you’ll save time and reduce frustration during your DIY projects. This simple yet effective solution promotes a well-ordered workspace.
How to set up drawer dividers:
1. Measure your drawers to determine the size of dividers needed.
2. Purchase or create dividers using wood or cardboard.
3. Organize tools by category—like screws, nails, and hand tools—into separate sections.
4. Label each section for quick identification.
This system allows you to maintain a tidy workspace and enhances your efficiency while working on projects!
5. Clear Storage Bins

Clear storage bins provide an excellent way to store small tools and supplies while allowing for easy visibility of their contents. This space-efficient method helps you quickly locate items without the hassle of opening multiple containers. These bins can be stacked or placed on shelves, making them ideal for smaller areas.
Labeling each bin enhances your organization, ensuring that you can find what you need right when you need it. This approach keeps your workspace clean and efficient.
Tips for organizing with clear storage bins:
1. Choose different bin sizes for varying tools and parts.
2. Label each bin according to its contents, such as ‘Drills’ or ‘Screws’.
3. Stack bins neatly on shelves, placing frequently used items at eye level.
4. Keep similar items together to avoid confusion while working.
This organized system allows you to maintain an efficient workspace, even in the tightest of settings.
6. Wall-Mounted Tool Holders

Wall-mounted tool holders offer a brilliant way to keep your most-used tools within easy reach while maximizing floor space. Available in various styles, from simple hooks to elaborate racks, these holders help you customize your organization. Not only do they enhance functionality, but they also add a unique character to your workspace.
By installing these holders, you create an aesthetic display of your favorite tools, making your workspace both practical and visually appealing.
Installation steps for wall-mounted holders:
1. Choose a suitable wall in your workshop or garage.
2. Select holders that fit your tools and personal style.
3. Securely mount the holders with proper anchors and screws.
4. Arrange your tools for easy access.
This approach not only keeps everything organized but also creates a beautiful showcase of your essential tools.
Did you know wall-mounted tool holders can reclaim up to 40% of floor space in a small workshop? They keep your most-used tools within easy reach, boosting tool box organization ideas and making DIY projects faster and more enjoyable.
Wall-Mounted Tool Holders
Editor’s Choice


7. Rolling Tool Carts

For a mobile tool storage solution, a rolling tool cart is an excellent choice. This versatile option allows you to transport your tools from one project to another while keeping everything neatly organized. With multiple tiers and compartments, you can easily designate areas for your tools and supplies, simplifying your workflow.
Rolling carts are also fantastic for small spaces since they can be tucked away when not in use. This practical solution encourages efficiency in your projects.
Building your rolling tool cart:
1. Choose a sturdy cart that meets your storage needs.
2. Organize tools based on frequently used projects.
3. Place heavier tools at the bottom for stability.
4. Add labels or color-code compartments for easy identification.
This dynamic storage option not only enhances tool management but also keeps your workspace clutter-free wherever you go.
8. Hanging Tool Bags

Hanging tool bags present a flexible and portable option for storing smaller tools and supplies. Ideal for those who work in various locations, these bags are lightweight and easy to manage. With multiple pockets and compartments, a hanging bag helps keep your essentials organized and readily accessible.
Simply hang the bag on a hook or doorknob, and you’re ready to tackle any project. This approach also adds a casual charm to your workspace.
Using hanging tool bags effectively:
1. Choose a durable bag with multiple pockets for different tools.
2. Categorize tools and place similar items in respective pockets.
3. Label pockets if desired for quick identification.
4. Hang it in a convenient location for easy access.
This practical solution not only provides organization but also brings a delightful touch to your tool storage!
Difficulty Rating & Requirements
Overall Difficulty Rating: Medium
Organizing your toolbox can be a fun and rewarding project, but it also requires some effort and planning. You’ll need to dedicate time to sort through your tools and decide on the best organization method. This task is suitable for DIY enthusiasts and beginner homeowners looking to improve their tool storage without feeling overwhelmed.
Time Estimate:
⏱ Estimated time: 3-5 hours
This time will vary based on the method you choose and the number of tools you have. Here’s a simple breakdown:
– Sorting Tools: 1-2 hours – Go through each tool and determine what to keep, toss, or donate.
– Organization Setup: 1-2 hours – Implement your chosen toolbox organization ideas.
– Final Touches: 1 hour – Clean up and ensure everything is in its place.
Skill Requirements:
– Required skills: Basic DIY skills, sorting, and planning abilities.
– Beginner-friendly: Yes. This project is ideal for beginners since it does not require advanced skills.
– Skills that can be learned vs. those requiring experience: Most tasks involve basic skills that can be learned, like measuring or hanging items. Advanced woodworking skills are only needed for specific custom solutions.
Tools & Materials Needed:
🧰 Essential items checklist:
– Screwdriver (required) – For assembling and mounting storage solutions.
– Drill (required) – For creating holes in walls or surfaces.
– Measuring tape (required) – To ensure proper sizing of storage units.
– Level (optional) – Helps ensure your pegboard or shelves are straight.
– Storage bins or boxes (required) – For organizing smaller tools and parts.
– Pegboard or wall hooks (optional) – For a DIY pegboard system.
– Labels (optional) – To help identify where each tool belongs.
– Adhesive hooks (optional) – Great for lightweight tools or items.
Step-by-Step Overview:
1. Sort and Assess Your Tools (1-2 hours): Start by gathering all your tools in one place. Go through each item, and decide what you need and what can be discarded or donated. This helps reduce clutter and makes organization easier.
2. Choose Your Organization Method (1-2 hours): Based on your space and tool types, select your preferred toolbox organization idea. Whether it’s a pegboard system, drawer dividers, or clear storage bins, determine which fits your needs best.
3. Setup and Arrange (1 hour): Begin implementing your chosen method. Hang, stack, or place your tools into their designated spaces. Ensure everything is secure and easily accessible.
4. Label and Finalize (1 hour): Take time to label where each tool goes. This is a quick step that can save you time in the future. Clean up any leftover materials, and step back to enjoy your newly organized workspace!
Professional vs DIY:
Hiring a professional organizer can range from $50 to $150 per hour, depending on the complexity and size of your space. If you have many tools or unique storage needs, investing in professional help might be beneficial. However, with the right DIY toolbox organization ideas, you can achieve a clutter-free workspace at minimal cost! Doing it yourself allows for personalization and satisfaction, making it worth the effort.
9. Toolbox Inserts

Toolbox inserts are an essential addition for keeping your tools organized and protected within your toolbox. These inserts can be custom-made or purchased and help separate tools, preventing them from moving around during transport. With various sizes available, you can tailor the organization to fit your toolbox perfectly.
This method is invaluable for efficient tool management, whether you’re dealing with hand tools or larger power tools.
How to effectively use toolbox inserts:
1. Measure your toolbox to determine the needed dimensions for inserts.
2. Purchase ready-made inserts or create your own from foam or wood.
3. Place tools in designated sections for easy access.
4. Adjust the arrangement as you acquire new tools.
This simple addition not only helps you find your tools quicker but also extends their lifespan by providing protection from damage.
Fun fact: well-designed toolbox inserts can cut tool-search time by up to 40%. With custom compartments, you’ll find every wrench in seconds and keep power tools protected during transport. It’s a small upgrade that delivers big gains in tool box organization ideas.
10. Use a Ladder for Vertical Storage

Transforming an old ladder into a tool storage solution offers a creative way to maximize space while displaying your tools stylishly. Leaning a ladder against a wall allows you to hang tools on the rungs or place bins on the steps, creating a unique storage system. This method is especially effective in smaller areas like garages or garden sheds.
By implementing this vertical storage solution, you can keep your workspace tidy while showcasing your tools in a decorative manner.
Steps to implement a ladder for tool storage:
1. Choose a sturdy ladder that meets your height and width requirements.
2. Secure it against a wall for stability.
3. Hang tools from the rungs or place bins on the steps.
4. Add decorative elements like plants to enhance the look.
With this approach, you’ll enjoy a stylish and functional way to manage your tools while maintaining a clutter-free environment.
Use a Ladder for Vertical Storage
Editor’s Choice


11. Tool Shadow Boards

Creating a tool shadow board involves outlining your tools on the wall, providing a neat and organized way to store them. By painting or using tape to mark the spaces, you not only keep your tools in order but also have a visual cue for what’s missing. This method is particularly useful in workspaces where tools often go astray.
Utilizing a shadow board adds an artistic flair to your space, making it both functional and visually appealing.
Creating a shadow board:
1. Choose a wall space and gather your tools for layout planning.
2. Outline the tools with painter’s tape or paint around them.
3. Hang tools in their designated spots, aligning them with the outlines.
4. Maintain organization by returning tools to their shadows after use.
This creative method not only enhances tool management but also helps maintain a clutter-free workspace.
12. Tool Chest on Wheels

A tool chest on wheels offers the ultimate convenience for those needing to transport their tools frequently. Equipped with compartments and drawers, these chests provide ample space for organization and even a work surface on top. With your tools securely stored in a mobile unit, navigating job sites becomes effortless.
This rolling solution significantly impacts your workspace organization, ensuring everything has its designated spot.
Choosing a tool chest on wheels:
1. Assess your tool collection to determine size and compartments needed.
2. Look for a durable chest that withstands frequent movement.
3. Organize tools by usage, placing frequently accessed items at the top.
4. Ensure it features locking options for security when not in use.
This rolling option enhances tool management and transforms your DIY experience into a more efficient process.
Conclusion

Transforming your workspace doesn’t have to be overwhelming. With these toolbox organization ideas, you can create a clutter-free environment that enhances productivity and creativity. From pegboards to repurposed suitcases, each solution offers a unique way to manage your tools while adding a personal touch to your decor.
As you experiment with these ideas, remember that the best organization system is the one that fits your needs and lifestyle. Start small, and you’ll find that keeping tools easy to find can lead to a more enjoyable DIY experience!
Note: We aim to provide accurate product links, but some may occasionally expire or become unavailable. If this happens, please search directly on Amazon for the product or a suitable alternative.
This post contains Amazon affiliate links, meaning we may earn a small commission if you purchase through our links, at no extra cost to you.
Frequently Asked Questions
Question: What are the best tool box organization ideas for small spaces?
Here are some top tool box organization ideas for small spaces that actually work.
Start with a quick plan: map out zones for hand tools, power tools, and fasteners so every item has a home and you can find it quickly.
Install a wall-mounted pegboard or slat wall to free bench space and keep commonly used tools within arm’s reach. Pair it with sturdy hooks and thoughtful spacing so you can easily add or remove tools.
Use vertical storage like rails, magnetic strips for metal tools, and clear, labeled bins for small parts to keep clutter down. Flexible shelving or stackable bins can grow with your collection.
Label everything and keep a clutter-free workspace by performing a quick weekly tidy. This is a simple, scalable approach to tool storage solutions that supports garage organization tips and DIY tool organization.
Question: How can I DIY tool storage solutions that actually keep my garage and workspace clutter-free?
Try a modular, DIY tool storage solution that can grow with you: measure space, pick a pegboard/rail system, and add a rolling cart for mobility.
Mount vertical storage to free bench space and use labeled, clear bins for small parts.
Keep tools grouped by function (hand tools, power tools, fasteners) and add a magnetic strip for metal items.
Label everything and schedule a 5-minute weekly tidy to maintain tool box organization ideas and tool storage solutions. This approach makes efficient tool management and a clutter-free workspace achievable in any garage or workshop.
Question: What garage organization tips help tools stay easy to find in a hurry?
Focus on fast, visual organization that speeds up your search.
Keep the most-used items near the door and a dedicated zone for daily drivers. Install a pegboard wall and magnetic strips for quick access, plus labeled bins or shallow drawers for fasteners.
Use color-coding by category (e.g., electrical, carpentry) to cut search time, and maintain a master inventory so you know exactly what you have and where it belongs. This practical setup supports garage organization tips and tool storage solutions that keep your space efficient and clutter-free.
Question: How do I build an efficient tool management system for a compact home workspace?
Start by defining zones for frequently used tools versus rarely used ones. Place everyday items in an easy-to-reach top drawer or tray to speed projects.
Add a shadow board or labeled panels so you can see when a tool is missing, promoting DIY tool organization and efficient tool management.
Use vertical storage like pegboards or slim cabinets to maximize tiny spaces, and perform a quick monthly audit to maintain a clutter-free workspace without overspending.
Question: What materials and products work best for tool storage solutions, and how can I implement them on a budget?
Good options include steel pegboard with powder-coated hooks, wall rails, clear plastic bins, shallow drawer organizers, foam inserts for tool trays, and magnetic strips.
Implementation tips: assess space, list must-have tools, and start with a base system (pegboard + shelving). Mount at a comfortable height, then organize by function and label zones.
Upgrade gradually as needed to fit your budget, and keep the layout flexible so you can adapt to new tools. With these materials and a smart layout, you’ll have a practical tool storage solution that keeps your workspace clutter-free and efficient.